Study
in the (mis)uses of Papyrus Cartonnage, and Recovery/Conservation of its
Layers
by Robert Kraft (begun 27 Sept 2006)
This essay describes the way in which cartonnage containing attractive
color representations has been mutilated for the sake of increasing
income from the sale of its pieces. This particular example is taken
from the eBay sales by Bruce Ferrini and associates in 2005-2006, but
it is probably typical of what has happened to cartonnage papyri
through the years, when preservation of the painted surfaces was not a
primary motivating factor. (In the 1960s movie you saw sulphuric acid
used to dissolve the plaster and painted surface.)
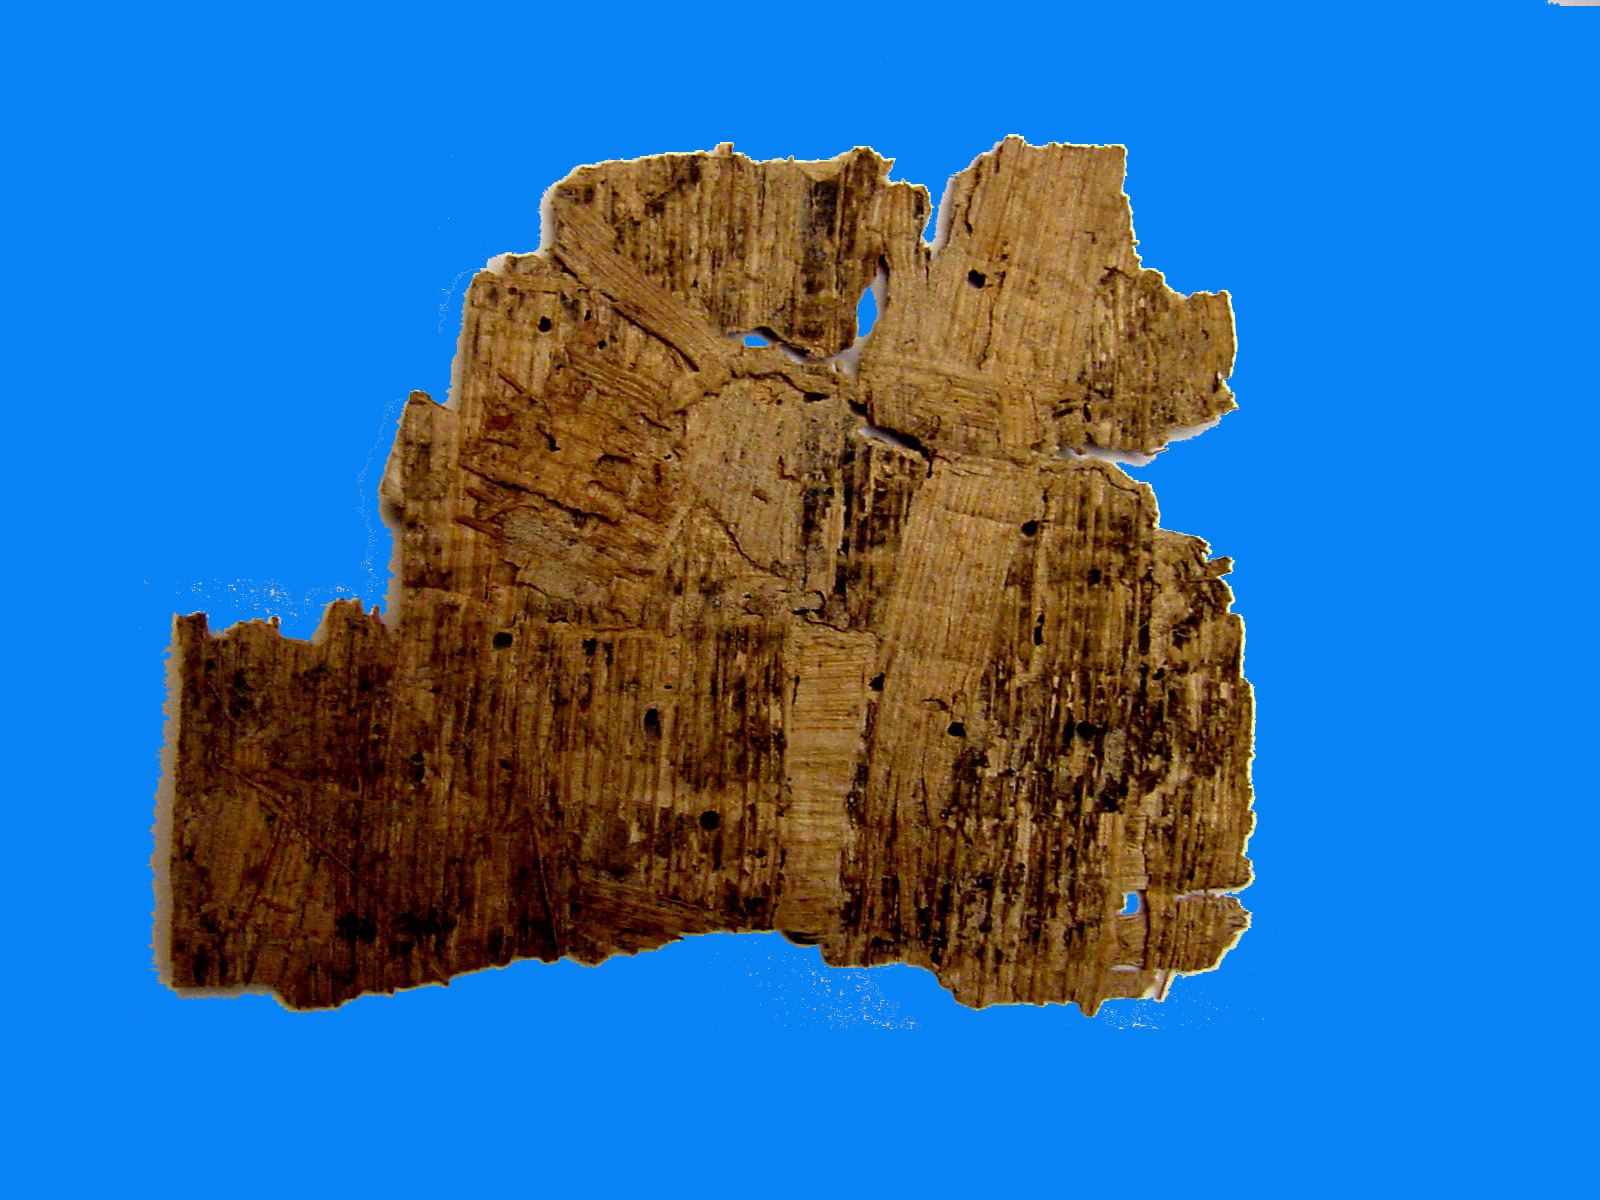
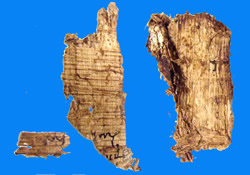
Here is a cartonnage fragment that has preserved both (1) a plastered
and painted face surface on the left, and (2) a plastered unpainted
other side on the right [PPennKraft 044; 83x52 mm]. Unfortunately, it
has obviously been cut from the originally surrounding material, and
probably broken off as well. An image of the once intact larger
cartonnage piece can be seen here.
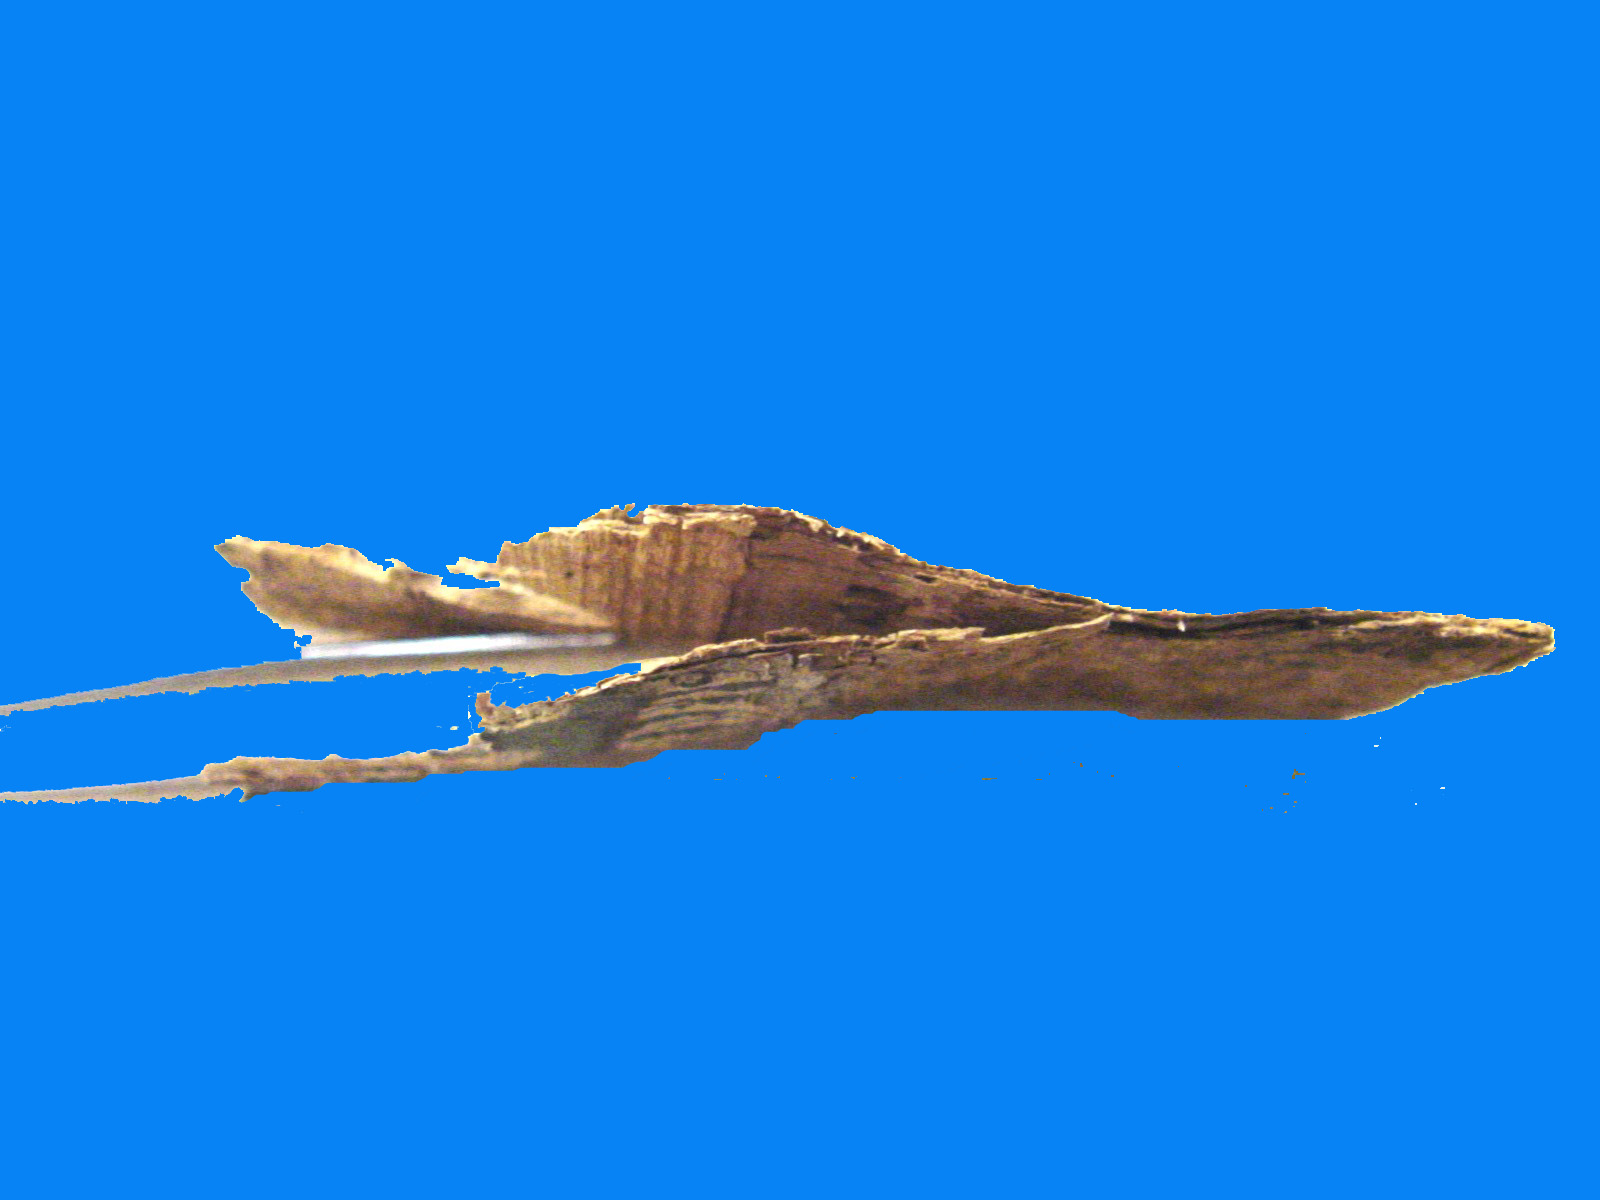
This fragment is made up of two or more layers of papyri used as a base
to which the plaster has been applied on both sides. In the following
view with the piece held vertically, you can glimpse the painted design
on the plane facing downward, and the partial forced separation of
papyrus layers (gently held apart by tweezers):
Looking back at the first image, note that part of the painted surface
(at the right of the lefthand image) is missing, leaving exposed a bare
section of papyrus. If the partial forced separation between the two
outer surfaces were continued, something like the following would
happen with removal of the unpainted plastered portion (the image to
the left):


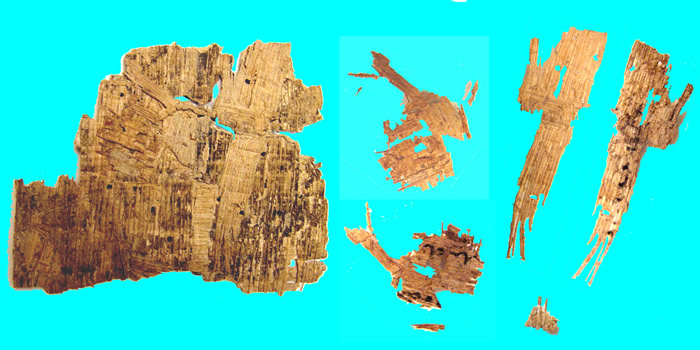
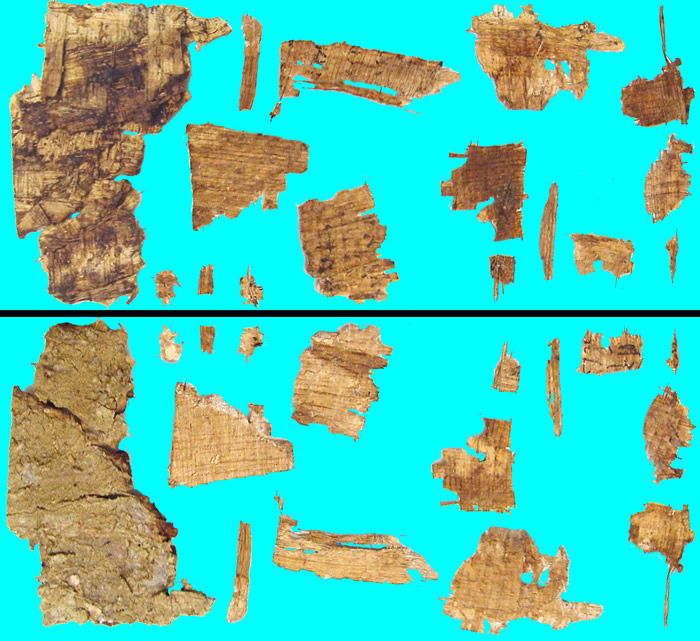
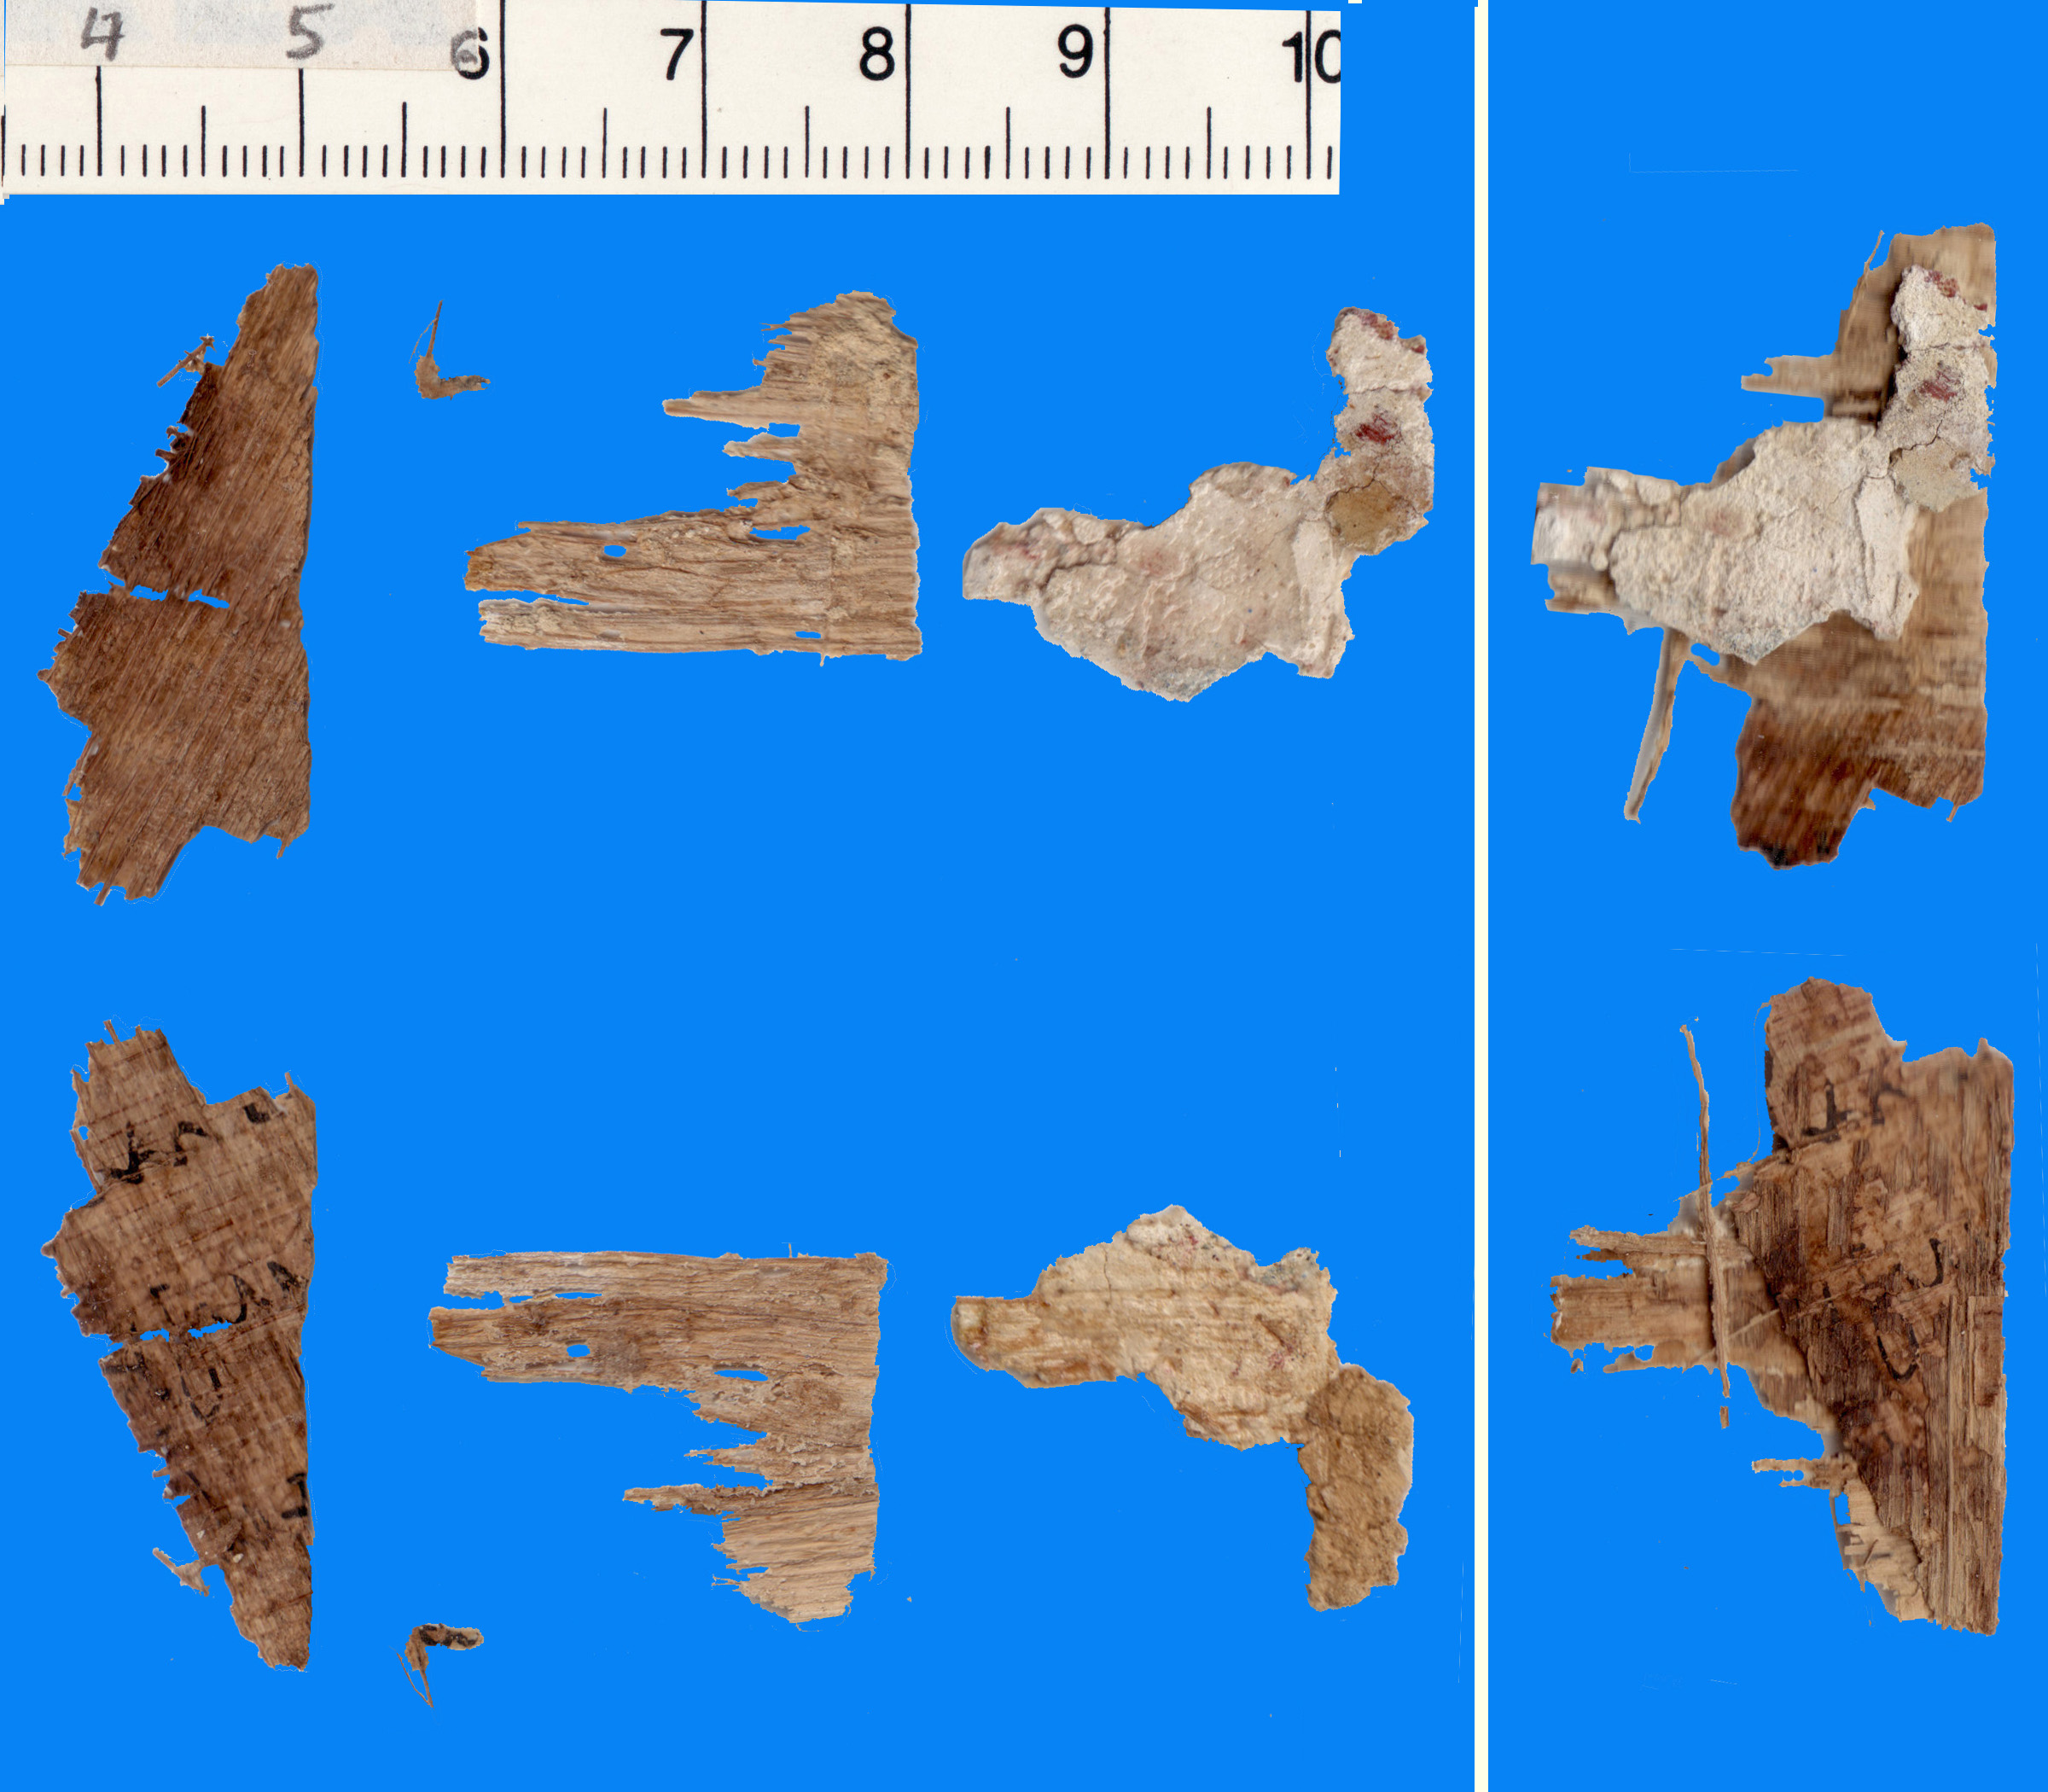
This joined image comes from the same original cartonnage as our first
example, showing the back side first. In the middle of the
fragment to the right on the backside is a patch of the yellowish
unpainted plaster, while around it the various layers of papyri have
been torn away without regard for their integrity, leaving various
fiber patterns. Fortunately, in this case, the surface of the front
image depicting a winged figure is relatively undamaged [PPennKraft
036+039; c 125x80 mm].
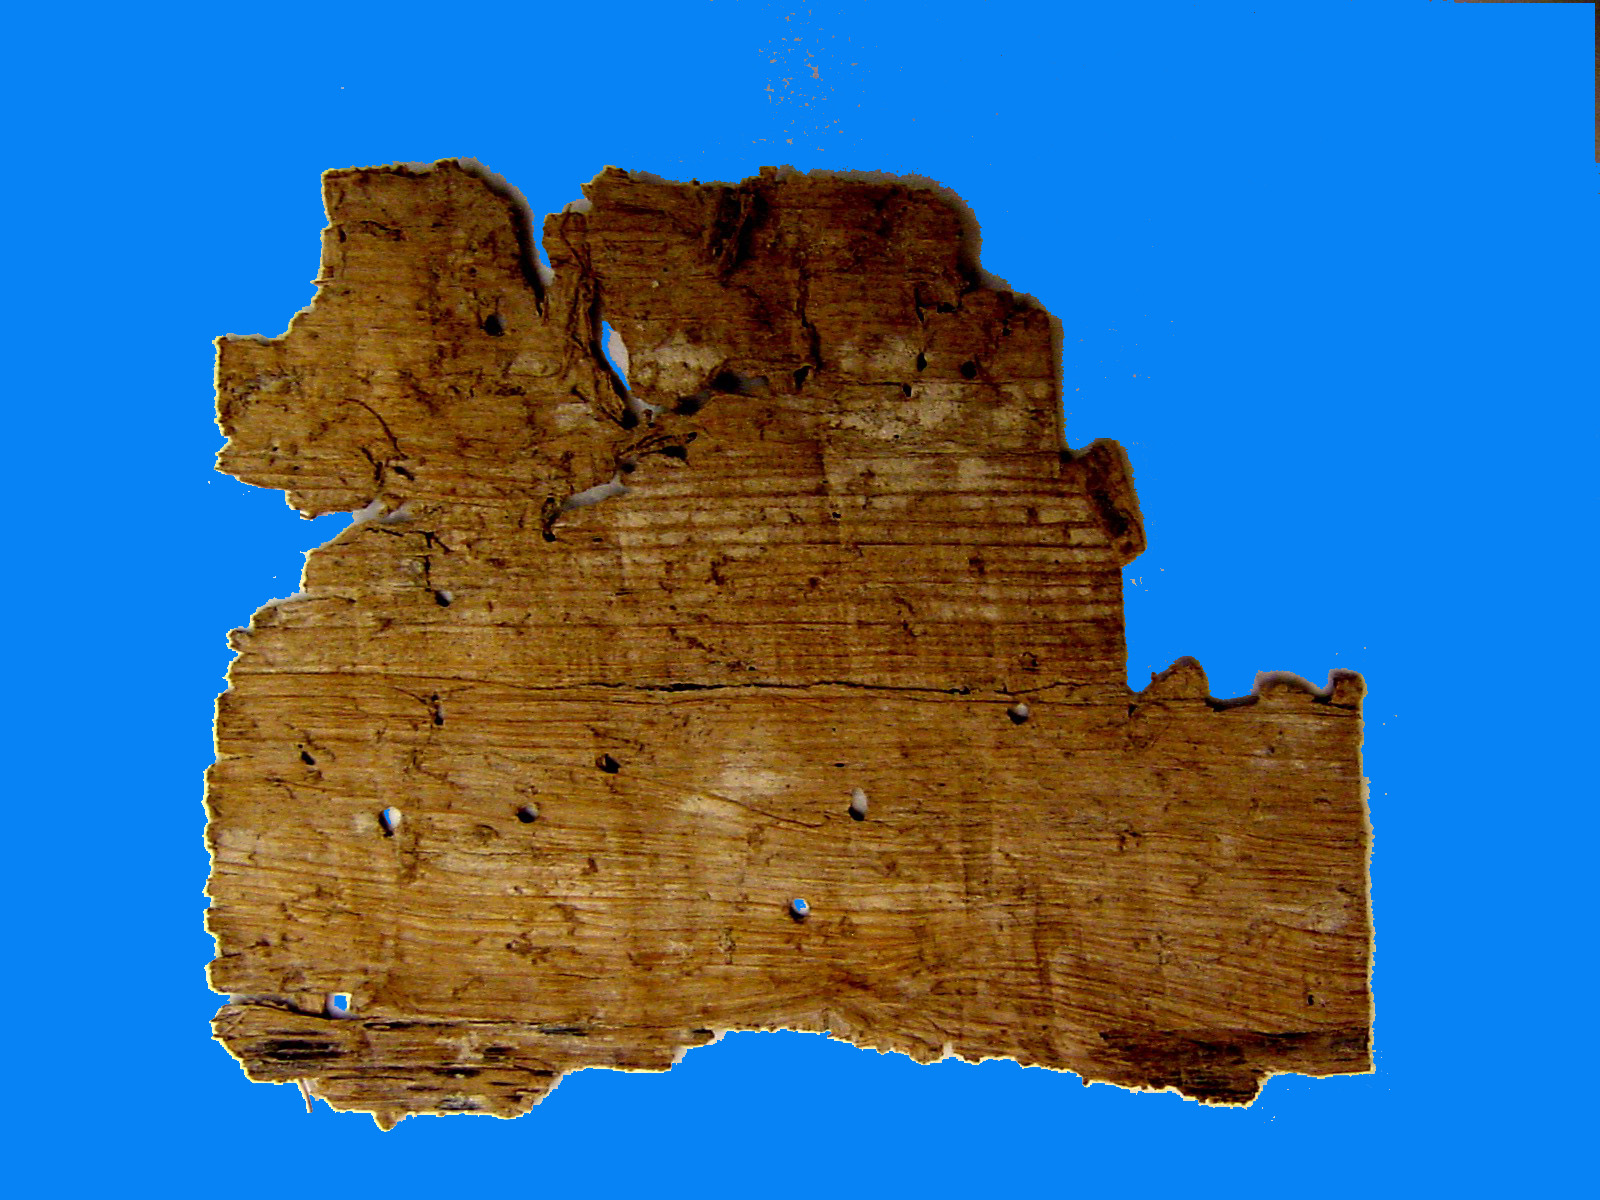
The papyri layers that originally lay between the two plastered
surfaces might have contained writing, and the splitting off of papyri
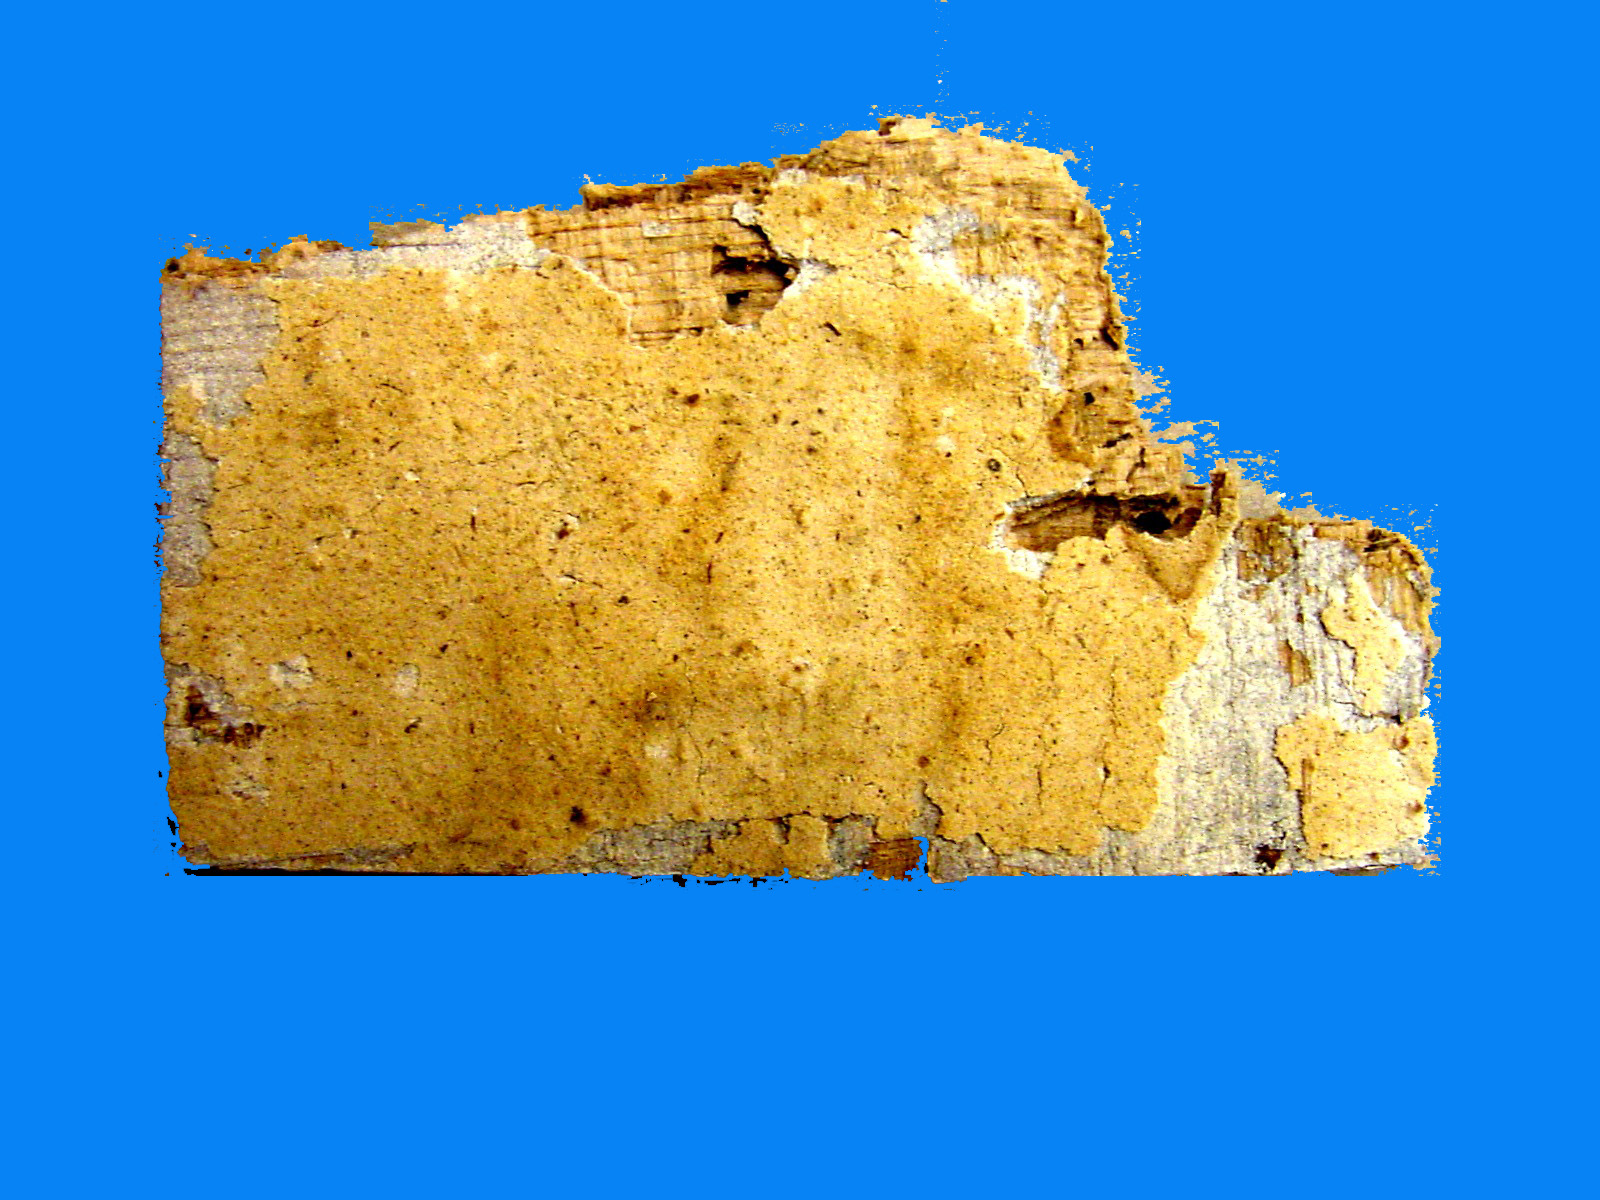
layers is presumably a crude attempt to expose such saleable gems. Here
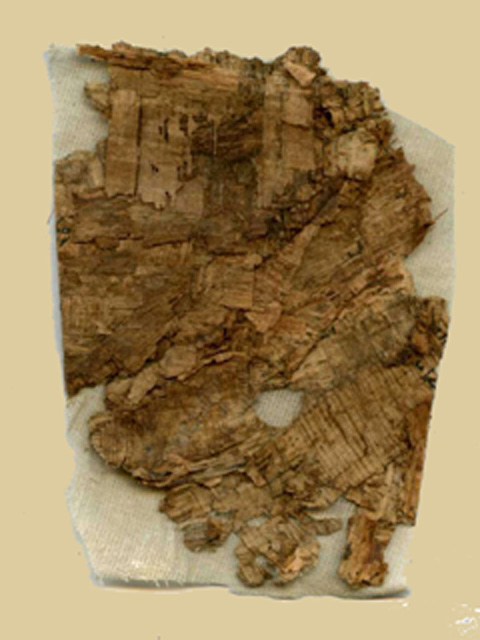
is an example of a split off fragment that proved to be blank, and
accordingly sold for a lesser price than fragments with writing
[PPennKraft 055.2, 69x53 mm]:
On the left image is a relatively smooth surface, probably the "back"
of a cartonnage fragment (although possibly not heavily plastered
originally). On the right image are the clear evidences of forced
separation of this layer or group of layers from the presumed front
portion. It needed to be determined, if possible, whether any originally
intact surfaces (of layered papyri) remain under the somewhat confused
patterns on the right, and if so, how to remove the obstructing
layer(s) as carefully
as possible, with as little further damage as possible.
In the 1960s film, we saw a steaming
process being used to "relax" the papyrus pieces. My guess is that with
some of these cartonnage fragments, that might not be effective, since
the layers adhere so tightly to one another. It is not clear whether
the layers are held together by an adhesive (natural of artificial)
that is soluable in water. If so, humidification or a steaming or even a water bath
treatment should work, although the danger of splitting an original
layer is also present. If not, the use of liquid solvents such as
alcohol, benzyne, or acetone might be effective. Experimentation is
often necessary to determine the best approach to separating the
original layers, while at the same time preserving any art work or
plaster surfaces involved.
In the present instance, simple humidification and gentle removal of the overlaid split layers of papyrus (mainly those areas that show up in a lighter color in the right hand image) using a thin rounded blade (palette knife) proved effective, and indeed, writing was discovered on the down side of the removed layers (as seen below, with both sides of the removed layers showing). This suggests that the material split off from this piece also would have shown such writing on at least some parts.
Vocabulary:
here are the terms I propose to use in describing the following
processes:
"layer" = an original
papyrus structure, with horizontal and vertical surfaces on the
respective planes
"split layer" = the
result of separation of the original planes of a "layer"
"fibers" = the
visible remains of a damaged "layer" or "split layer"
"surface scraps" =
smaller pieces adhering to a surface, obscuring what lies beneath
"painted plaster" =
decorated surface with paint applied over plaster
"unpainted plaster" =
surface that has been plastered, but not decorated
"shiny surface" = unpainted surface to which some
sort of hard, shiny substance has been applied
"peanut brittle" = unpainted surface with a light brown grainy substance
Materials
and Equipment: here are the basic items to be used
(ideally) in the following processes:
digital camera and
adequate lighting for documenting stages
centimeter ruler or grid for image scale (width and height)
note making equipment
(paper, pencil, computer)
containers for the
humidifying process -- preferably "see through" and heat resistant
distilled water if
immersion will be necessary
surfaces for
flattening and drying (e.g. blotters, flexible mylar, etc.)
tools for separating,
flattening, moving (e.g. palette knife, tweezers, etc.)
cleaning solution
(benzyne, alcohol) -- note dangers of toxicity, etc.
tools for cleaning
(camel hair brush, "Q tips")
temporary and permanent storage material
(mylar, plexiglass, glass)
Main Challenges:
here are some of the difficulties to be anticipated:
how to preserve
plastered surfaces, especially those with painted designs
how to distinguish
integral layers from split layers
documenting each
significant stage for later reference
preserving and labelling each significant
stage
Test #1, on jumbled mass attached to modern
cloth base [PPennKraft 035; 92x70 mm]
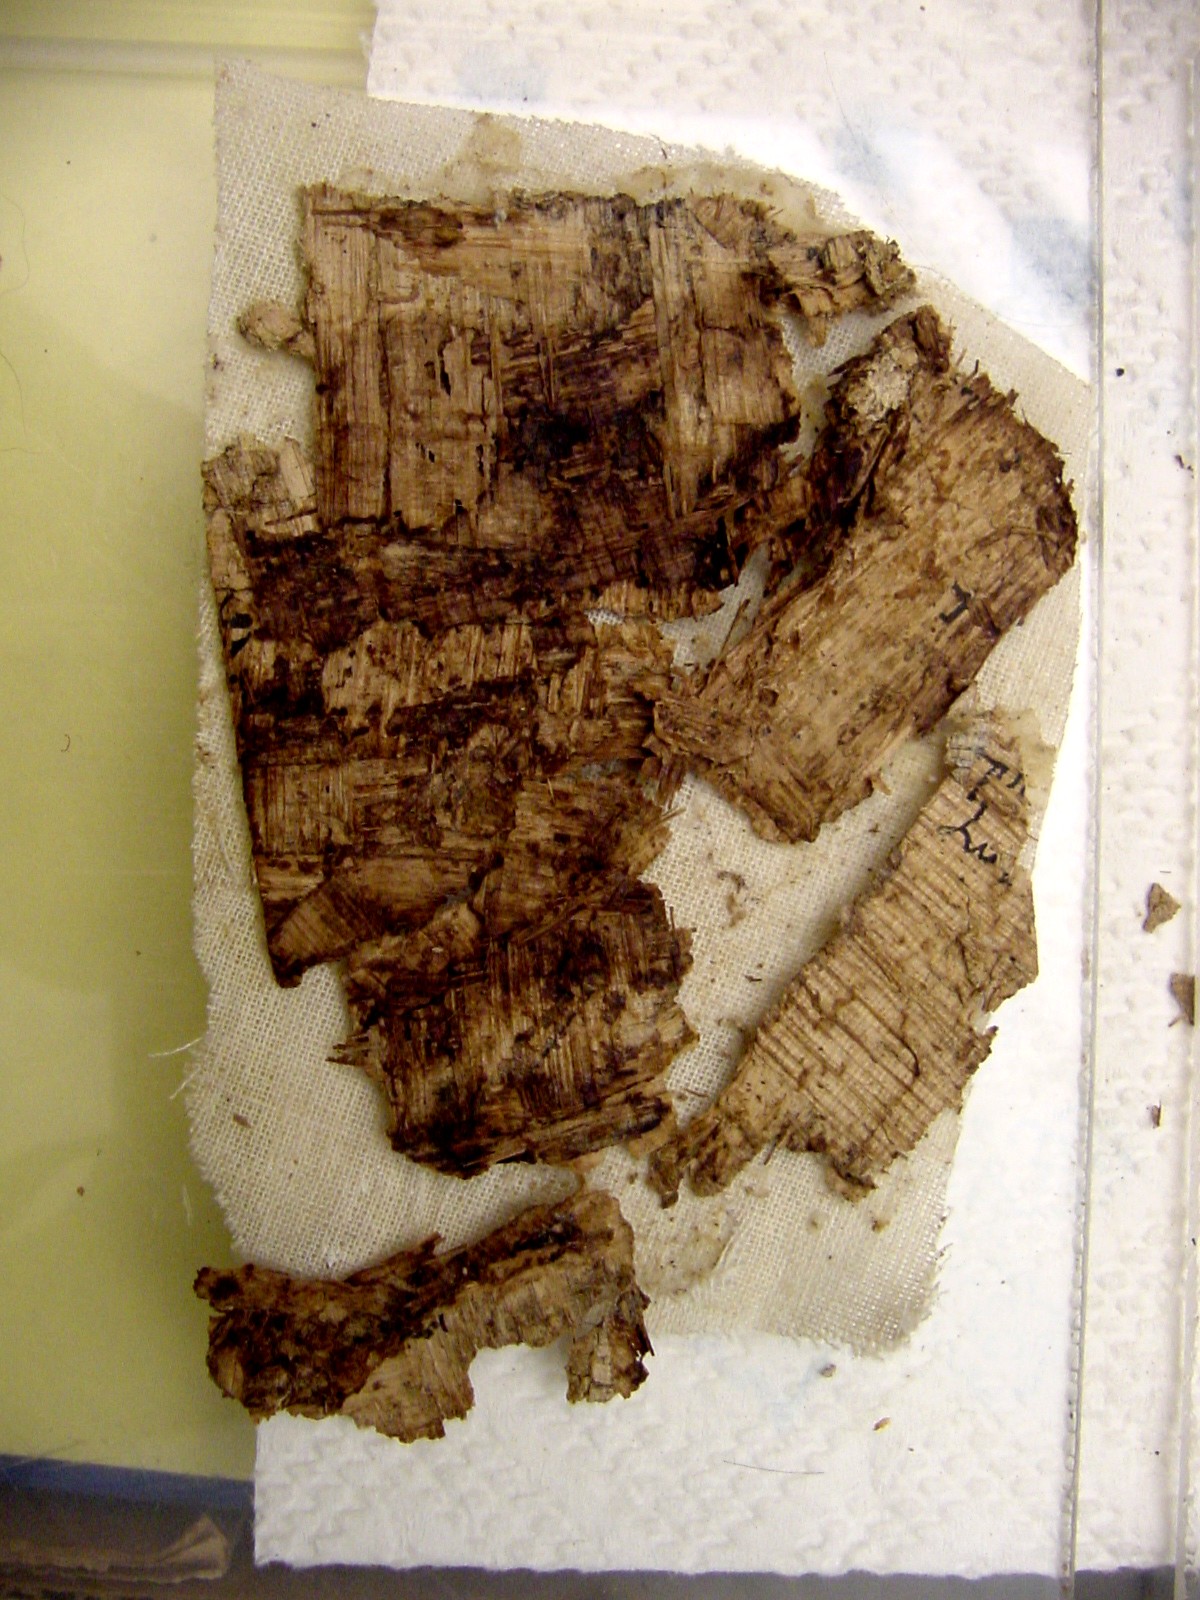
On the left is the eBay image. Traces of ink are visible at the top of the right side cut (almost half way up the image) and a bit farther up and to the left. On the right is the breakdown after removing the mass from the cloth base (using acetone, in this instance). The fragment with the fine black writing at the right has survived ("group C"), and the other fragment just above it, with traces of at least one letter ("group B").
The other side, which was firmly attached to the cloth by a very tenacious adhesive, proved to be covered with the hard, peanut-brittle resembling coating, possibly also a modern feature (if so, it is unlikely to have covered any writing). Here is how it looked (with lots of fragmentation caused by the removal process); no single continuous piece of papyrus seems to have covered the entire area (the four larger segments will be labelled groups A-D below):

In the right image are the inscribed fragments that are barely visible in the first image above. The two on the left ("group C" and a separate small fragment) might be from the same plane (written along the fibers), but the one on the right ("group B") is written against the fibers and thus not continuous with the others.
Disassembly of the largest piece proved difficult, and was finally accomplished by soaking it for several hours in water that had been heated to the boiling point. The main results appear below, with the larger recovered pieces in approximately their original positions in relation to the original lump (which actually divided itself into three smaller configurations along the weak lines visible in the left hand images). Writing appeared on at least three of the layers, including one small fragment that appears to be hieratic or hieroglyphic. In the process, the "peanut brittle" layer was destroyed except for some small chips.
For convenience and clarity, we need to label the items processed. Since the above section is the largest unit to survive removal from the cloth backing, it will be referred to as "group A" composed of what proved to be three separable parts, "A-1" (top, when viewed in the original position imaged above, with the exposed papyri facing up), "A-2" (middle section), and "A-3" (lower and smallest of these sections). The pieces rescued from group A will be numbered 035.01, 035.02, etc. (there are 15 showing in the above images).
"Group B" is the piece showing what looks like the Greek letter "T" or possibly "P"; "group C" is the piece with parts of two Greek (?) lines in small ligatured letters; "group C" is the next smaller piece. All of these groups had the rough "peanut brittle" backing that needed removal to facilitate flattening, possible exposure of writing (there was none) or other layers, etc. The process used here was humidification, plus dabbing on of alcohol, which softened the layer and made it possible to scrape it off carefully. Aside from straightening the edges and removing small surface split layering, groups B and C needed no extensive treatment. There were no significant additional layers.
Group D, however, proved to be a small piece that had been rolled and folded, and after the backing had been removed, opened up into a larger piece with some writing on it. No attempt was made to remove the backing from the smaller scraps.
Test #2: Very small painted cartonnage scraps [PPennKraft "cart114.1-6"]
These six small pieces were purchased together and all display a painted surface of some sort, sometimes carelessly oversmeared with a white paint. Two of them also have layers of material adhering to the painted plaster. The other four show evidence of having been united to papyri, but now have only the indentations or at best, half of a split layer embedded. Here is the original image supplied on eBay, followed by basic descriptions:
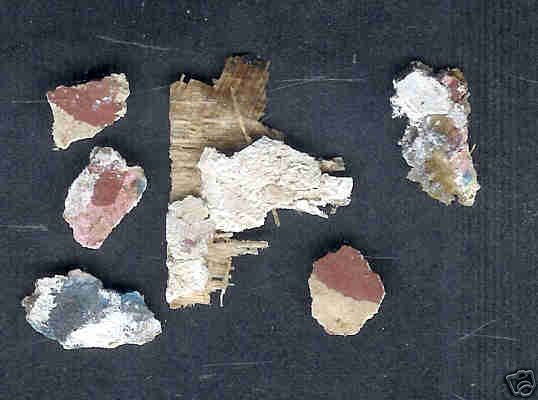
114.1 (2.2 x 3.4 cm) is the largest, and some writing is visible on the back layer. It will be treated in more detail below.
114.2 (1.6 x 1.0 cm, at lower left) shows dark blue-black and white paint, and has a split layer adhering to the back. I did not attempt to remove it.
114.3 (1.6 x 0.9 cm, at upper right) shows traces of red, blue, and pink paint, oversmeared with white, and a complex small layer-lump adhering to the back. The lump was removed, but is held together by a shiny hard material which resisted treatment.
114.4 (1.2 x 0.8 cm, at middle left) shows red, pink, blue, and traces of white, with some fibers from a split layer embedded on the back.
114.5 (1.0 x 0.8 cm, at upper left) shows red, tan, and a hint of white, also with fibers embedded on the back. It is almost certainly from the same larger piece as 114.6.
114.6 (1.1 x 1.0 cm, at lower right) is red and tan almost button shaped, also with fibers embedded on the back. It is almost certainly from the same larger piece as 114.5.
Here are the results of separating the layers of 114.1 (original cluster on the right, 2.2 x 3.4 cm; separate layers to the left, in their relative positions, loose fibers not shown except for one unplaced piece containing ink)
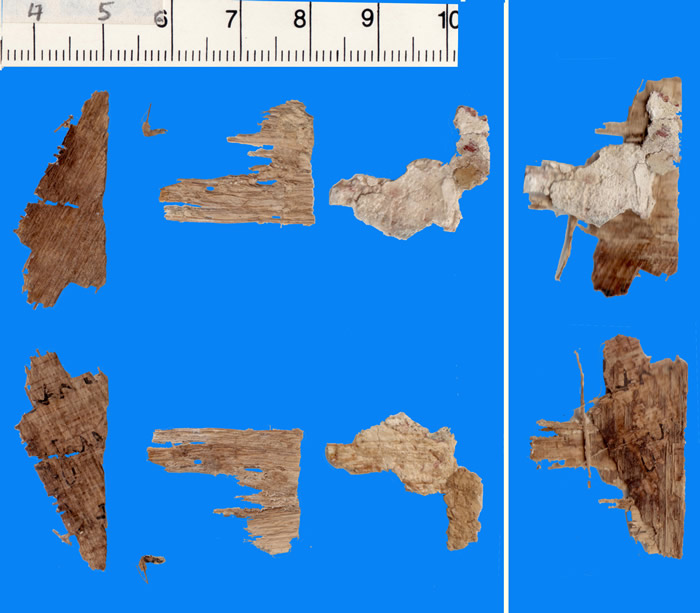
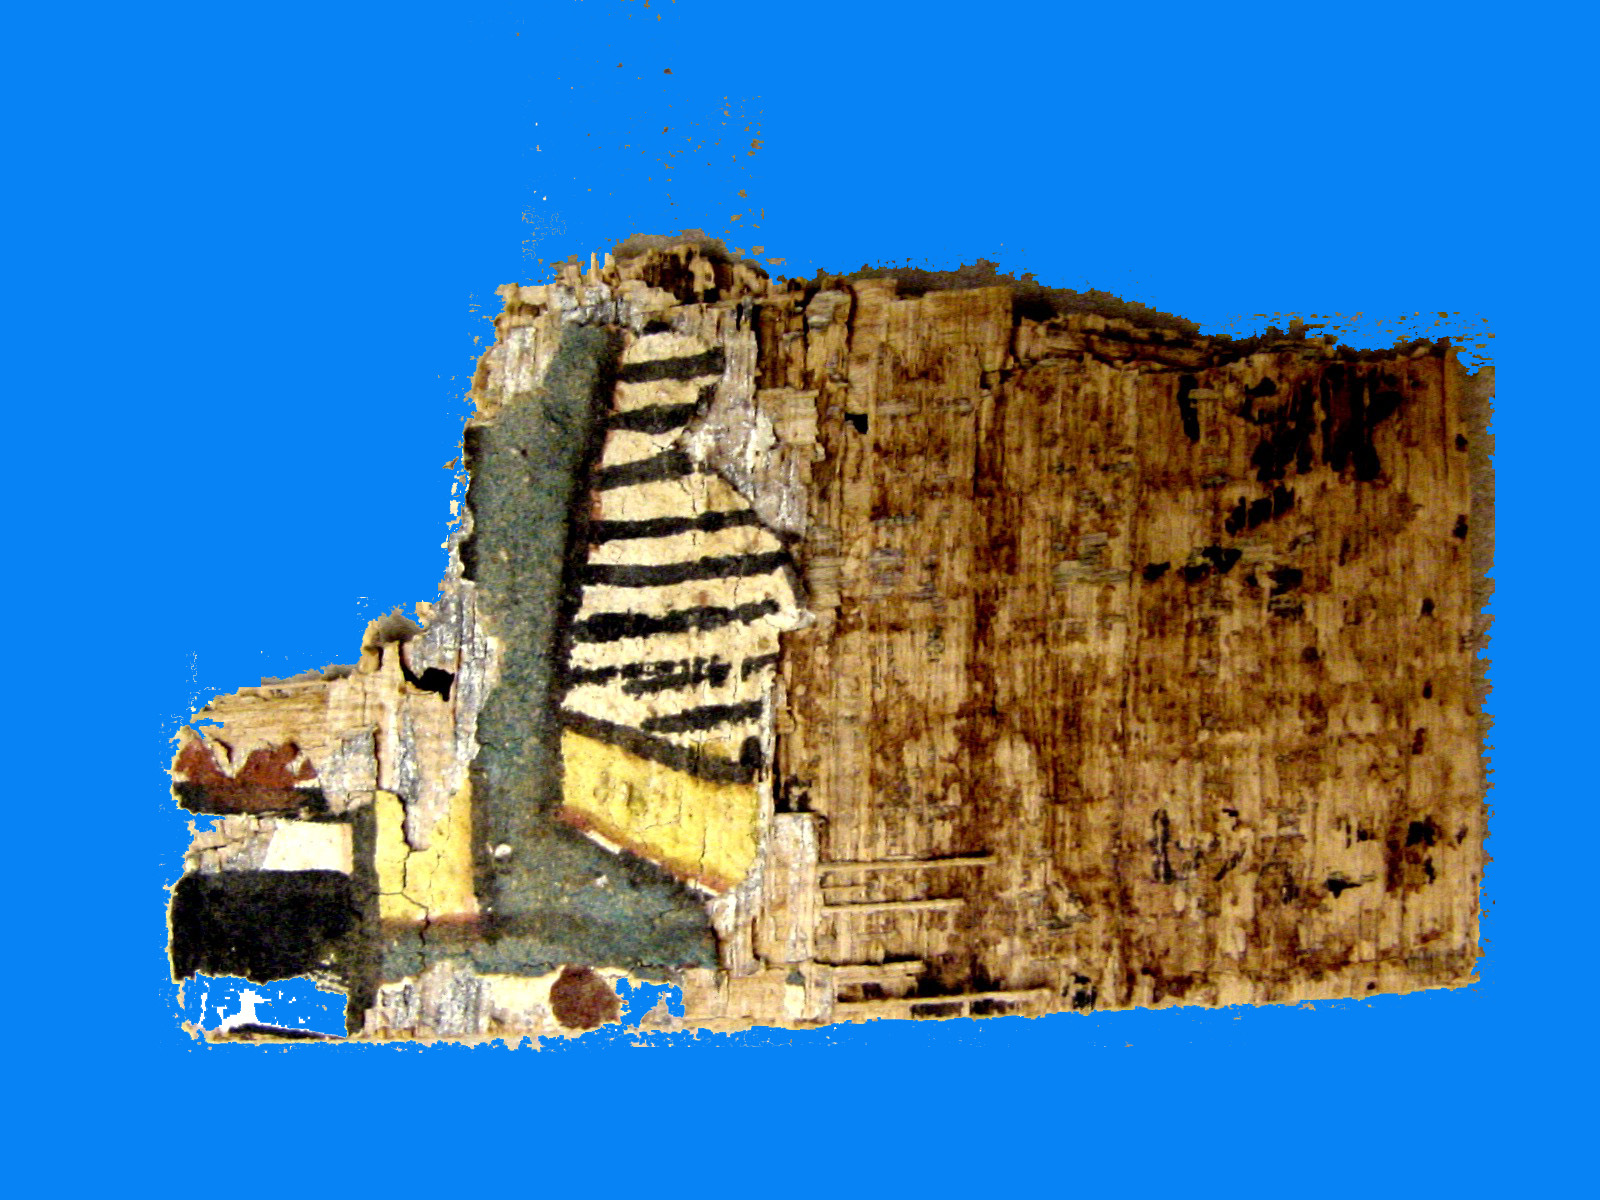
Test #3: Small painted cartonnage group [PPennKraft 078]
Here we have a layered piece of cartonnage with painted greenish-blue stripes against a tan background. The problem is how to preserved the painted surface while also removing the papyri layers. The original images are on the right side below, and the progressive layering progresses in order to the left. The topmost images show the layers as you proceed down from the painted surface; the lower images proceed up from the back of the clump -- that is, the topmost layers when looking from the back are to the left, matching the top row of images.
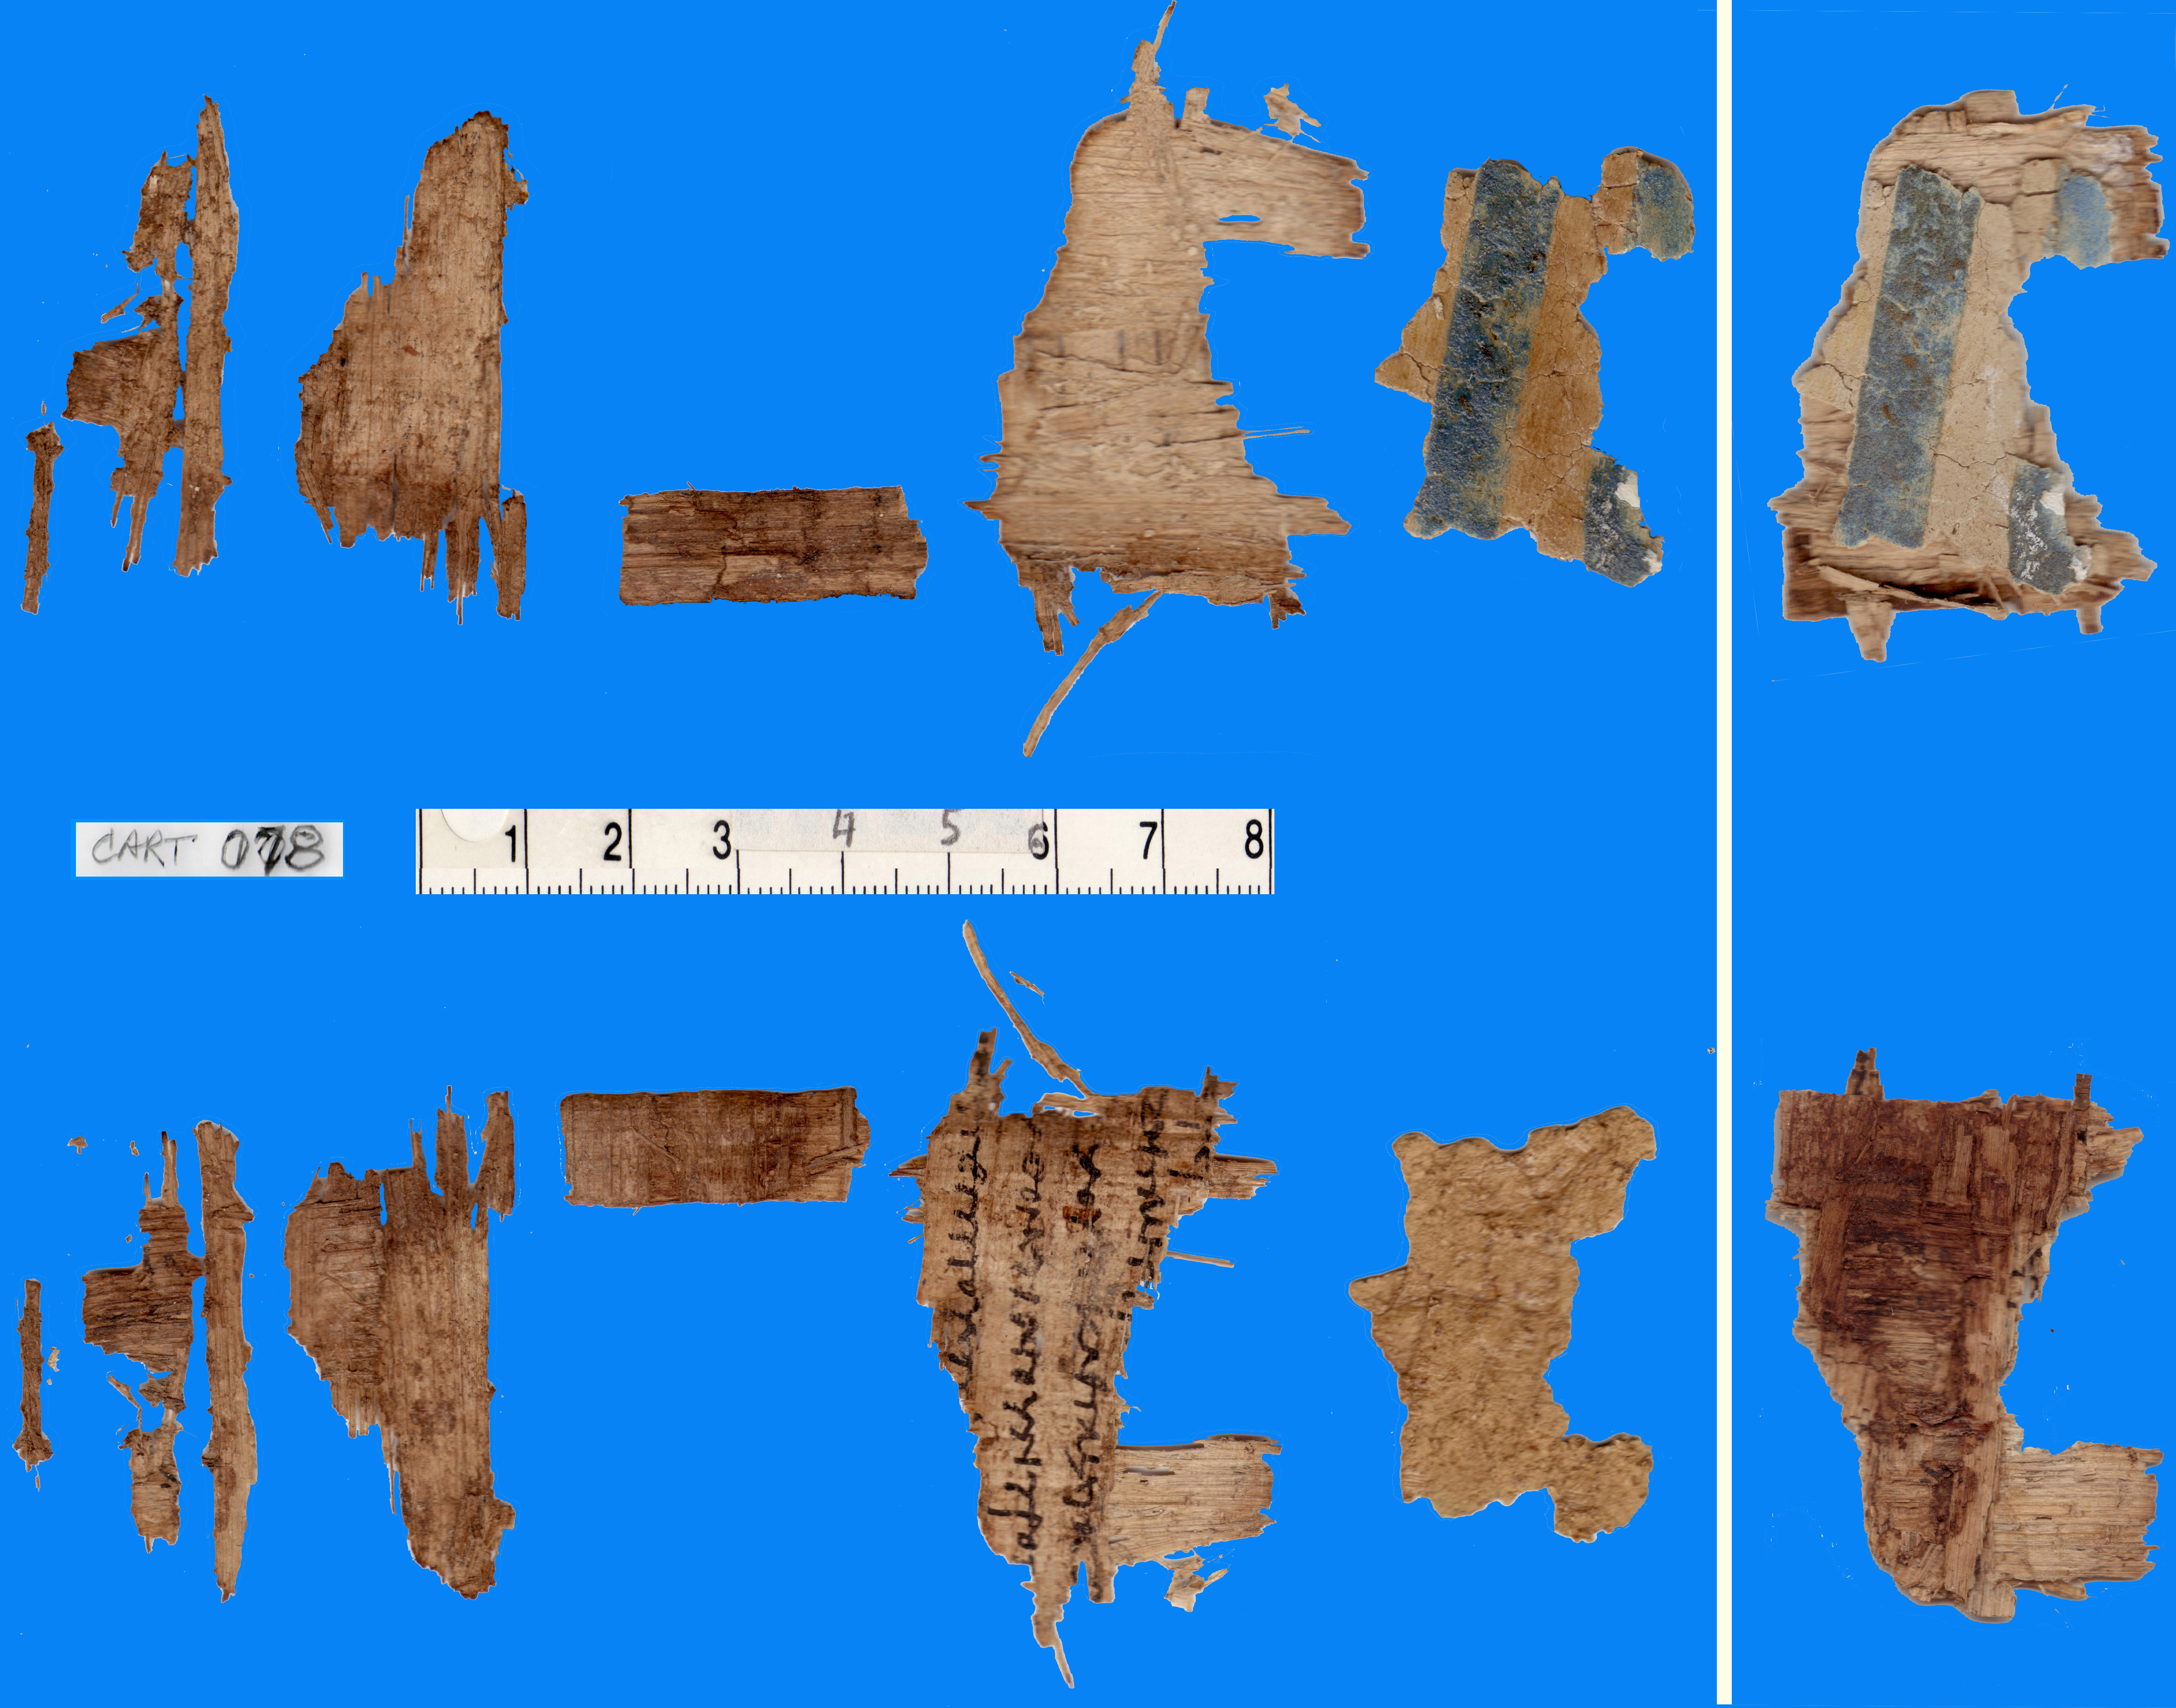
At the start of the separation process, small traces of ink were visible at the edges of the lower image, which turned out to be a nicely written documentary fragment, the first layer up from the plaster. The written surface was covered by a small rectangular piece on one side, and over that a rough triangular piece and some stray fibers (unless they originally were part of the triangular piece).
The separation process consisted of the following steps:
(1) Three coats of "Sally Hansen Hard as Nails" clear nail polish was spread carefully over the painted surface, trying not to let it flow over to the papyri but at the same time making sure it covered the cracks in the plaster in order to hold everything together.
(2) Standard humidification did not penetrate the lump sufficiently to permit separation of the layers, so the entire piece was immersed in heated water for about two hours.
(3) This softened the side of the plaster that adhered to the papyri sufficiently that a thin hobby-knife blade could be gently worked between plaster and papyri to separate the layers from the plaster. The coated painted surface remained intact through the process. Tape could have been used over the coated surface to insure that it would remain intact, but that was not necessary in this instance.
(4) With the papyri layers separate from the plaster, the process of separating the layers proceeded normally, with careful use of the thin blade sliding between layers.
(5) Cleanup of stray fibers, pieces of dirt, etc., came next,
(6) Then the pieces were dried between glass, to insure flattening.
(7) Finally, three coats of the clear nail polish were applied to the back side of the painted plaster, to strengthen that material, which was then mounted between glass and a mylar cover over the painted surface (to reduce chances of crushing the plaster, or cracking it).
Before, during and after the process, digital images and (after drying) scans were made, as well as written notes on the various stages. Probably the nailpolish coating on the painted surface can now be removed, but I would like to experiment first with some less interesting pieces before attempting that. I don't consider it an important step at this point, but there might be reason for it in the future.
Finally, here is an enlarged image of the written fragment (6.0 wide x 3.7 high), ready for us to attempt transcription!
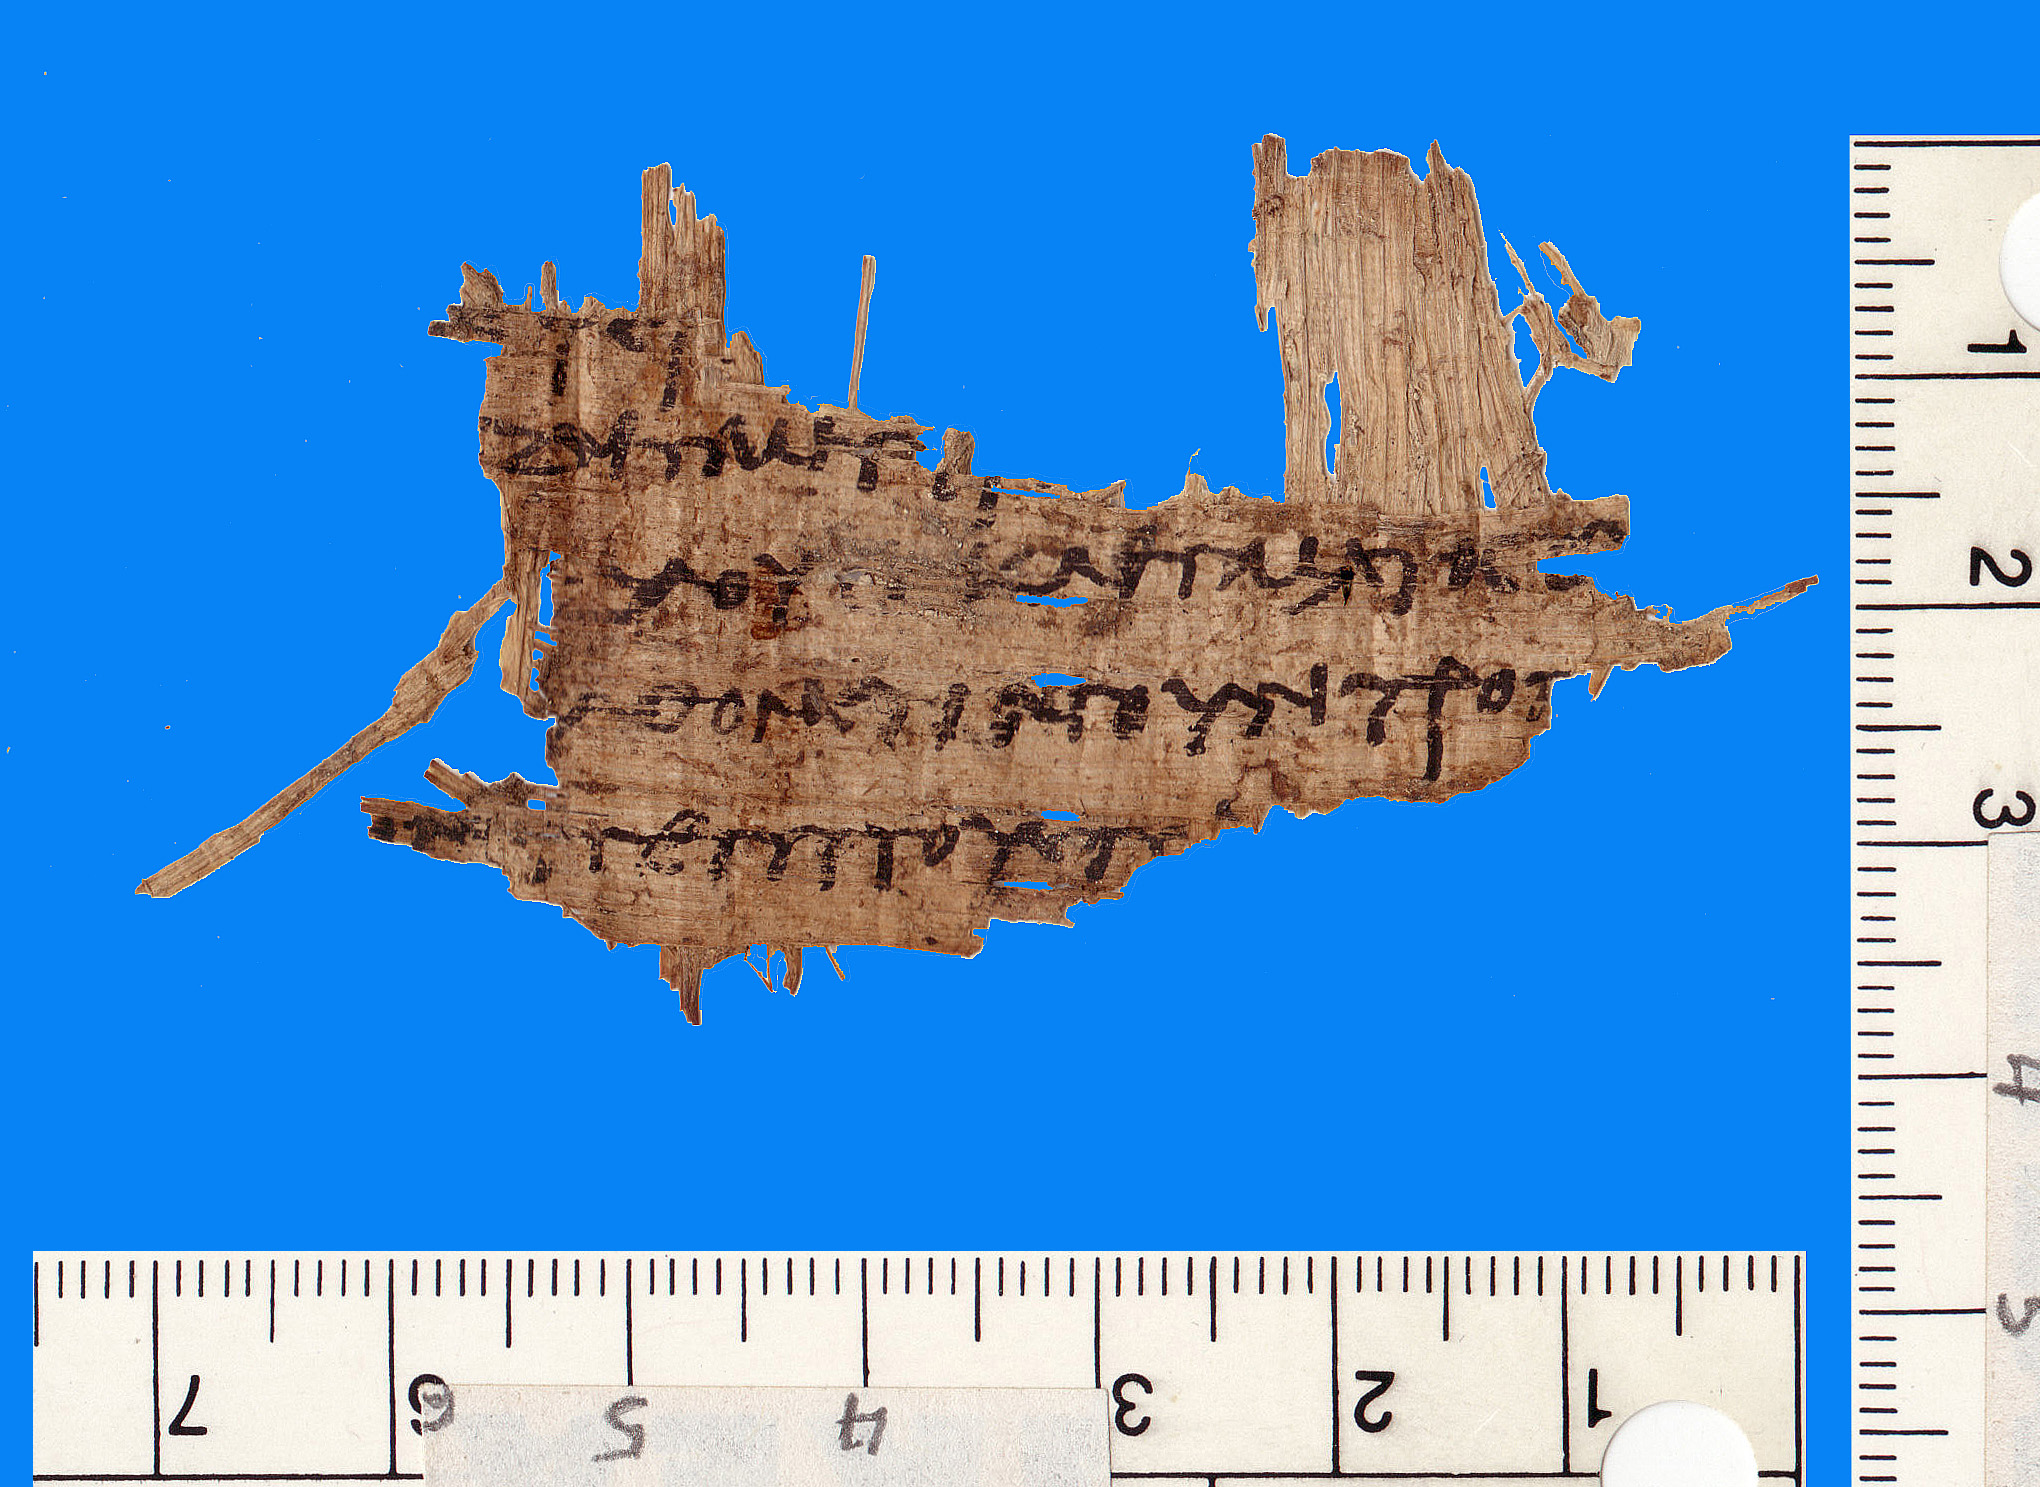
1. ] . . Φ [
2. ] Δ . . . . . . . . . [
3. ] . Λ Ο Υ . . . Κ Λ . Γ Μ . Ι Σ Τ Ο Σ . [
4. K] A Θ Ο N T Ι N Ο Υ Ν Τ Ρ Ο Π [ΟΝ = καθ' ὁντινοῦν τρόπον [a frequent idiom: "by whatever means"?]
5.] . . Π Ε Μ Π Ο Υ Τ . . [
Test #4 another modern mounted miscellany [PPennKraft cart045-1]
I was attempting to preserve an area of the "peanut brittle" surface of the largest portion of cart045, after it has all been removed (using an acetone soak) from the modern cloth backing,
as well as the papyri layers attached to it. I first coated the "brickle" surface with nail polish, then applied magic tape to the exposed fibers to keep them together during humidification. The tape was effective enough to permit "rolling back" those split layers, but was impossible to remove cleanly (with alcohol) afterwards. Here is what came into view (on the left) when I came to the layer to which the "brickle" adhered. I couldn't make much sense of it, beyond the obvious fact that it was nice Greek letters, so I inverted it in PhotoShop and voila, something worth a closer look emerged. The quick images, taken when it was yet wet, are shown here
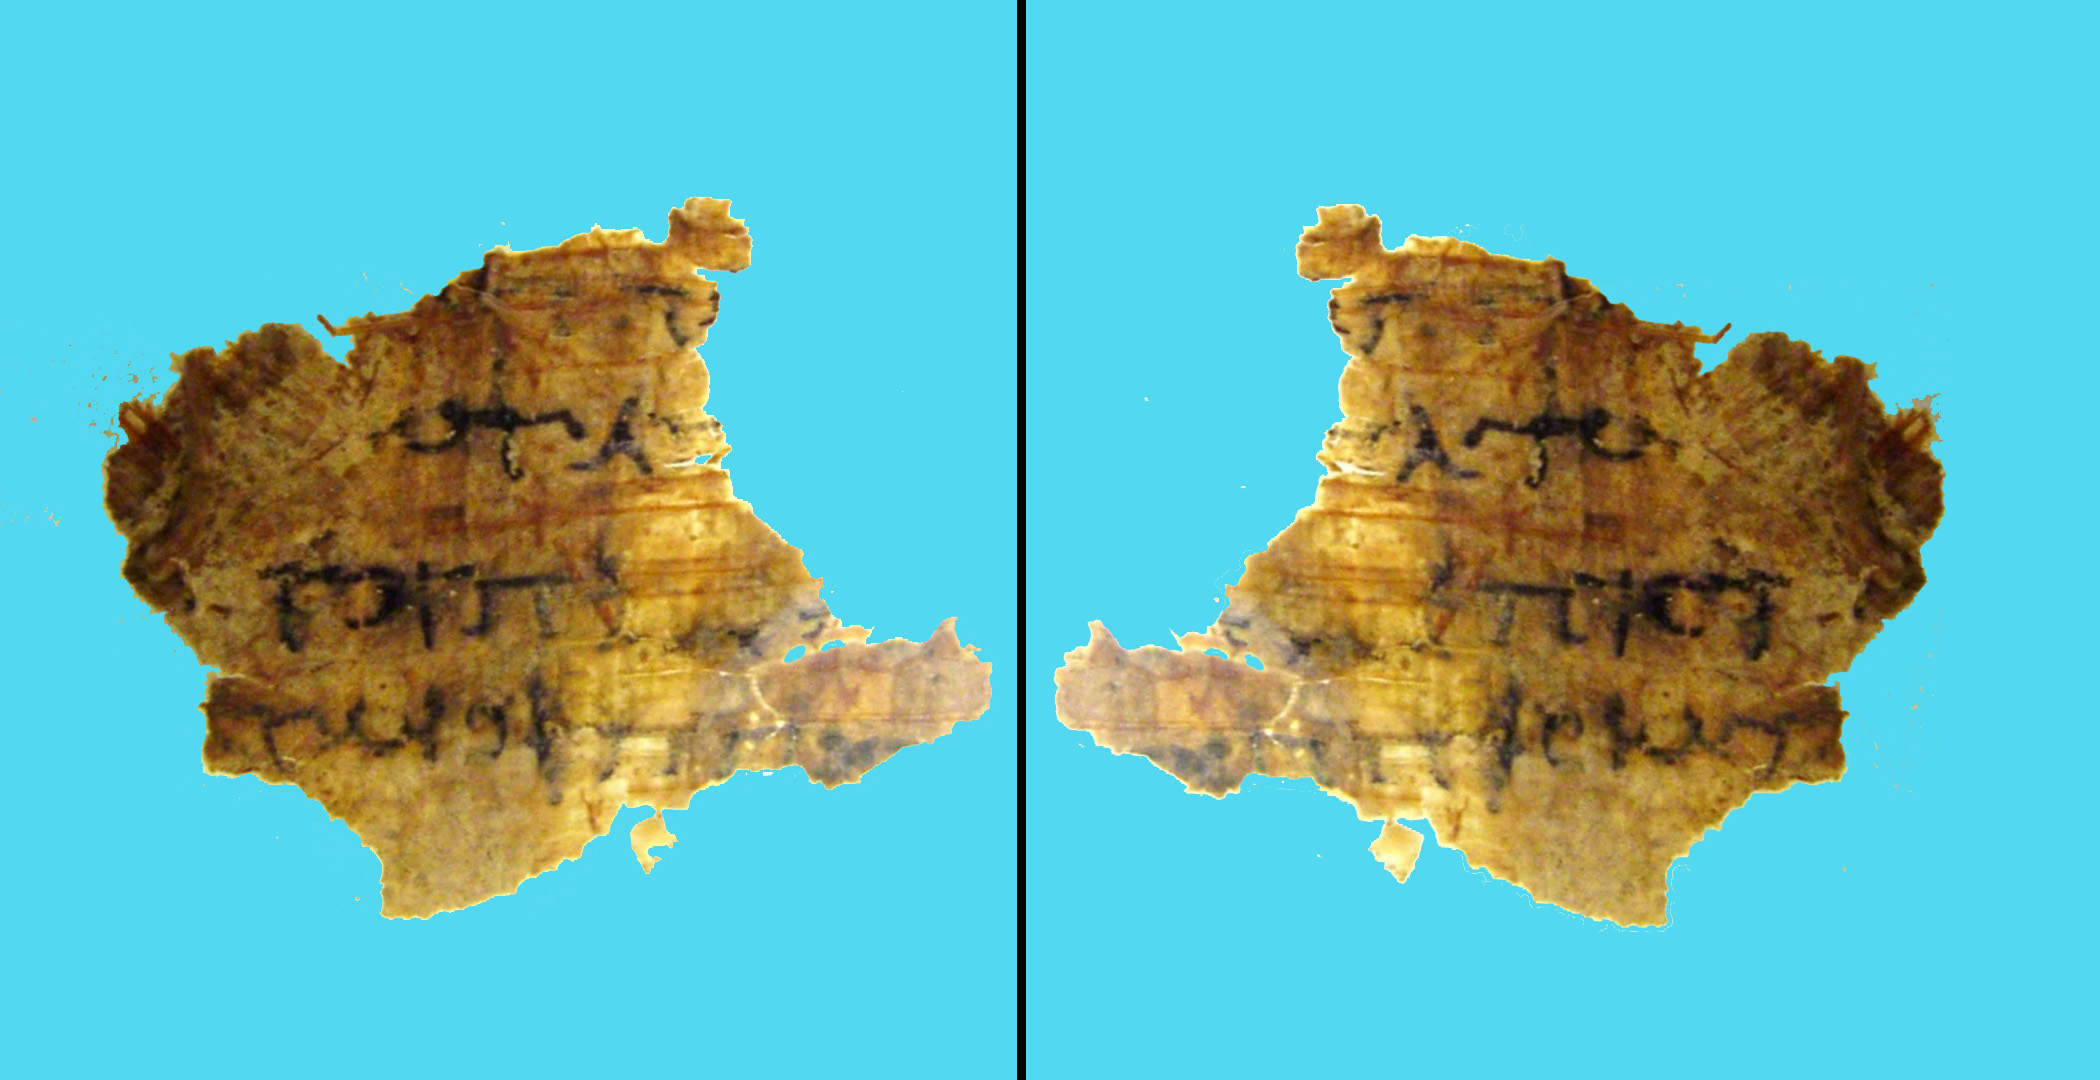
What you actually see is on the left. What it looks like inverted (i.e. as if in a mirror) is on the right. I make it out as:
]P. .[
].ATW[ (more to be removed here, perhaps)
]. . PIST.[
]..PISKATA[
Here is how it would have looked under the layer of "brickle" (note that some of the ink can still be seen through the coating):
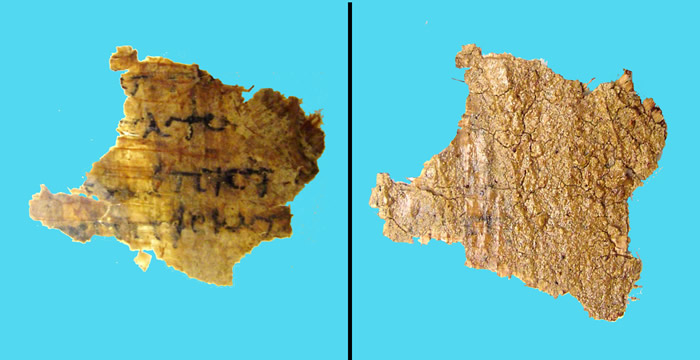
Explanation: Apparently the "brickle" stuff preserved the letters to which it adhered. Incidentally, this is evidence that the "brickle" was probably not applied by a modern enterpreneur, since it covered what could have been a marketable fragment. If I had removed the "brickle" using processes applied to other such pieces, it is possible that the writing would have been preserved intact. It is also possible that it would have been destroyed with the "brickle" material.
Side note: the process of using magic tape to hold split layers together is a good idea in principle, but in this experiment, it proved difficult to remove cleanly with alcohol. Perhaps a coat of nail polish to the exposed side before attempting removal would have keep the fibers together more completely. Further experimentation is needed.
[to be continued]
[prepared 27 Sept 2006; latest update 13no06]